The do-it-yourselfers dilemma
July 7, 2010
‘Do it yourself’ could be my (doggone) middle name. I’ve decided that there must be a missing connection in my brain somewhere; it’s the connector that fails to deliver a warning when I discover a new craft or trade which I admire and then begin to tell myself – “Oh, I bet I could learn to do that!” Right then there should be flashing lights and bells clanging, but the malfunctioning connection has fooled me again. Sometimes it is so fun to be fooled.
Right now though, I’m quite questioning my sanity and my middle name. You see, we have a family wedding in just a few weeks, our son is getting married to his sweetie pie. And so – I’ve been told that the only responsibility of the mother of the groom is to wear beige and shut up – but somehow it’s not quite happening that way. And it’s my own fault (mostly).
Well, being a flower grower, of course I would offer to help with the flowers – and that will be very special to have the church decorated with all our homegrown flowers. Not every bride wants garden flowers, so I am thrilled that they are thrilled to have garden flowers for the wedding!
Then let’s see – oh, the wedding cakes. Now, for some odd reason I decided to make my own wedding cake when I was 17 (with no warning lights or bells way back then, either), and have practiced the art off and on over the years. So I just couldn’t stand the thought of the brides family paying mooka money for wedding cakes when I could make them for just the cost of the ingredients! Well, I just had to offer, and they so kindly obliged me, and even offered to help out with the baking. Bonding in the kitchen!
I did hesitate on offering to make the buns though; I was a little worried that I might be taking too much on. But when I mentioned my doubt to my husband, he assured me that he would help (he really does make bread sometimes), and with his helpful help, we could gitter done. So that’s partly his fault, though maybe I didn’t argue my dilemma well enough. Anyway, I did make the first batch of buns today without his help, as he was busy taking the kids knee boarding at the lake. I’m not sure what he is busy doing tomorrow.
So the problem might be the missing brain connection, or it might be the fact that once you know how to do it yourself, it seems so wasteful to not do it yourself; and the homemade taste factor holds quite a bit of weight, too. But I wonder if the day will come that I will be happy to write the check and let someone else do it all for me? Somehow that doesn’t sound like me, but then, after all, how would I know with my missing brain connection?
Are there any other do-it-yourselfers out there that have a hard time not doing it yourself?
The endless possibilities when you do-it-yourself
March 18, 2010
I thought I was done adding trees to our apple orchard until Winter hung around too long, leaving me too much time to research and dream about heirloom apples and home pressed cider. Well really, I should have known I wasn’t done – with gardening and growing are we ever really done?
Last Spring we added four new apple trees to our small orchard, and I had anticipated adding just one or two more this year. That is, until Winter hung around forever, and until, I saw a video about saddle grafting your own apple trees. Suddenly the possibilities were endless – any apple variety of my choice on any rootstock of my choice; goodness gracious, talk about exciting!
I found a very helpful list of heirloom apple varieties to choose from which helped me to narrow down my choices of scion wood to purchase. Scion wood is a dormant young branch of the variety of apple that you want your tree to produce. Another helpful list I used was all about apple rootstock, explaining the pros and cons of the various rootstock available.
I ended up choosing Geneva 30 rootstock from Cummins Nursery. For scion wood I choose Oriole, Golden Russet, Cortland, Roxbury Russet, and MN 1734, available from Maple Valley Orchards and Nursery. The cost per tree comes out to $12.00, about a third or less of the price for purchasing them bareroot. What remains to be seen is if I have saved ANY money at all; perhaps I’m overly optimistic about the success of grafting my own apple trees – it could end up to be money down the drain or in the compost heap. Until my hopes are completely dashed, I will be dreaming about apple cider, apple dumplings, and apple tart in just a few short years …….
Is anyone else planting heirloom or cider apples, and what varieties did you plant?
Read previous post: Planting apple trees for fresh apple cider
O Christmas Tree, how brown thy branches
December 23, 2009
Last week we cut our own Christmas tree on the back 40. We’ll call it a Christmas tree, but technically, it’s a scrubby brown swamp cypress tree that was growing wild in the lane. But the price was right, and we had fun traipsing through the woods to find the prettiest scrubby tree. It looks kind of a sorry sight at first, but as the tree comes out of dormancy in the warm house, it will start to turn color – and magically turn into a green Christmas tree!
We stopped to check out the spruce trees we’ve planted way on the back 40 that will be our REAL Christmas trees in a few years – love that green!
Polka Dot Pumpkin Project
October 23, 2009

Here is a fun and easy pumpkin project to do. You need a few different color pumpkins, squash, or gourds, and a rubber mallet and an apple corer with plunger.
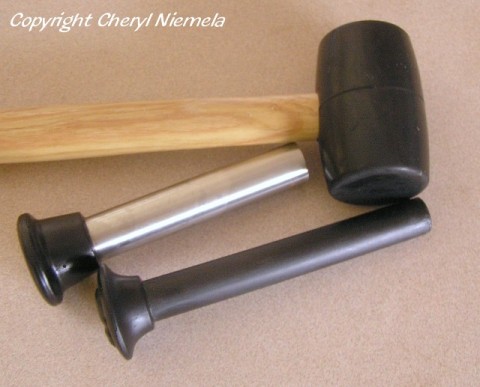
1. Tap apple corer with rubber mallet until through the rind, remove the apple corer. Then use the plunger and rubber mallet to remove the core from the apple corer; save the core/dots. Remove as many or as few circles as you wish.

2. Trim the rough pulpy ends of dots with a knife, then place a dot of hot glue inside an empty hole to help keep dots in place; then fill the hole with a different colored dot. Repeat until all holes are filled – then enjoy your polka dot pumpkin!

A fun project for kids and adults! Besides orange pumpkins, I grew a gray pumpkin, Jarrahdale, and a white pumpkin, Valenciano, to use for this project.
Many hands make little work
August 25, 2009
Our sweet corn is ready, so over the past weekend we gathered family together to have a corn freezing day. Four generations worked together to freeze 130 quarts of corn. It really didn’t seem like that much work with all the helpful hands, and everyone that helped took home corn to put in their freezer. I will think of this beautiful summer day every time we have corn this winter.
We set up outside

We had corn pickers

and corn huskers
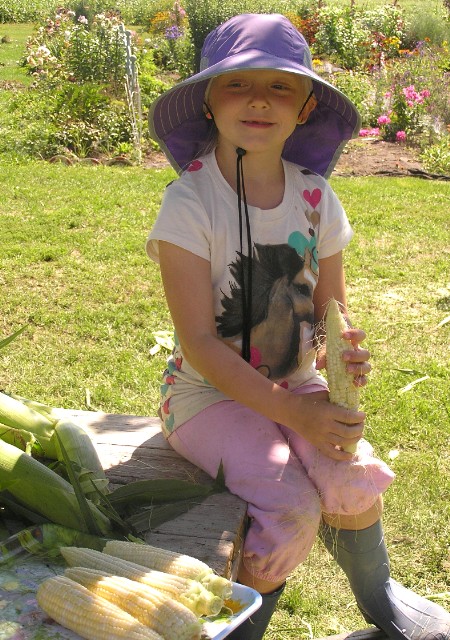
corn scrubbers

corn cutters

corn cob haulers

corn husk haulers
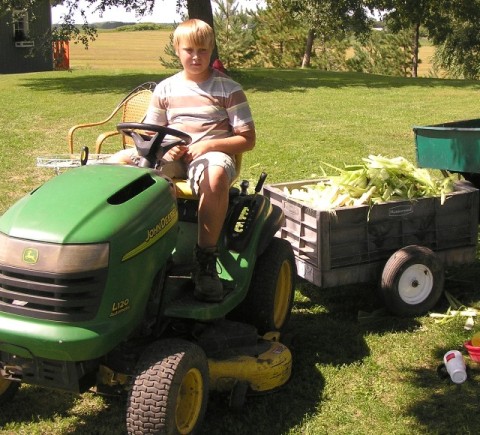
and corn eaters at the end of the day

Do it Yourself ~ Print your own product labels
May 20, 2009
After being featured in the Customer Spotlight with OnlineLabels.com for our product labeling, we have been contacted by many small businesses asking us to share how we have achieved the look of ‘professional’ labels.
When I was researching printers, I found the Canon Pixma iP4300 to be highly rated and reasonably priced, less than $100.00. It prints in resolutions of up to 9600 x 2400 dpi, printing in microscopic picoliters for exceptional detail. It also has five ink tanks, which helps keep the cost down as you only have to replace individual ink tanks when they run out, and offers borderless printing, which allows me to print labels right to the edge.
It took me some time experimenting with the settings to get my labels crisp and sharp, and this is what I have found works the best for the white glossy labels, and the clear matte labels that we get from OnlineLabels. These settings will NOT work for clear glossy labels, and I do not know about the plain white non-gloss labels.
When printing labels with the Canon Pixma iP4300 printer:
Under Main Setting Tab, for Media Type choose Photo Paper Pro
For Printer Quality choose Custom, then click Set, in the box that opens up click Diffusion and slide the number bar to #1, then click Okay to save setting.
For Color Intensity I choose Manual, then click Set, under Brightness I choose Dark in the drop down box, then Okay to save the setting. Normal or Manual setting will work also, I prefer to have the most colorful label I can print.
On Effects Setting Tab, I check Image Optimizer for sharpest printing results.
For borderless printing, click the Page Set Up Tab, in Page Layout check the Borderless Printing box, then under Amount of Extension, slide the bar all the way to the right.
Planting trees and planting memories
April 27, 2009

Saturday was Christmas tree planting day. Everyone in our family, young and old, were invited to help plant the trees and make memories.

A few years ago I had the idea of planting our own Christmas trees in a small field on the north end of our property. The idea was to gather all our family together each Spring to plant fir trees, and then, a number of years down the road, to gather again each year around the Holidays to go out and cut our own Christmas trees (while sipping hot cider, of course).

For three years now, we have planted our ‘someday Christmas trees’ together. Saturday was a nice sunny day for planting, and Sunday we had a soft rain all day. What a blessing!

And look at the hard workers!


Transplanting your seedlings
April 22, 2009
1. When seedlings have one or two sets of leaves, it is time to transplant them into individual containers. Start by watering the seedlings well before transplanting. Loosely fill containers or cell packs with moistened potting soil, then make a hole for the roots with your fingers in each container or cell.
2. Gently remove the seedlings from the tray. While holding onto the leaves of the seedling, use a butter knife or popsicle stick to gently lift up under the roots to remove the seedling. Always handle the seedling by the leaves or the root ball; the stem is very fragile and can easily be injured.

3. Place seedling in hole of individual cell or container. For very small plants like lettuce, I often put two plants in a cell.

4. Firm soil around seedling, adding soil to fill container or cell to the top.

5. When transplanting is finished, water seedlings with a weak fertilizer solution, and let them rest for 8-12 hours before putting them under grow lights or in a sunny window.

6. If growing on under lights, have the lights 1 or 2 inches above the top of the leaves, and move the lights up (or plants down) as the plants grow. Placing a fan to blow on the plants will make them sturdier, as will growing them on in cooler temperatures. Check your seed packet directions for recommended growing on temperatures.
7. Monitor for moisture; let the surface of the soil dry before watering again, and feed once a week with a very diluted solution of water soluble fertilizer. (Such as 1/4 teaspoon granular Miracle Gro to 1 gallon of water.)
8. A week before planting outside, begin to harden off the seedlings. Move the trays of seedlings outdoors in a shady location, and a protected area out of the wind. Bring them back indoors each evening for the first few days. After a few days, move to a half sun location, and a few days later to a full sun location. Keep them well watered, and move out of the sun if they show signs of wilting. Now you shouldn’t have to bring them indoors overnight unless the weather turns cold. After a week of hardening off, your transplants should be ready to get planted in your gardens or outside containers.
Germination of seeds
April 13, 2009
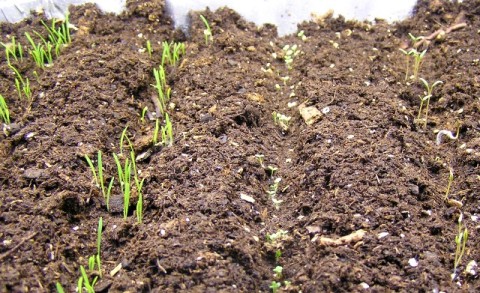
Just one week after planting seeds indoors, I have hundreds of seedlings that have germinated. The little green things just make my heart sing! Now I will be monitoring them for moisture, and waiting for the true leaves to appear so I can start transplanting into individual pots.
Starting your seeds indoors
April 8, 2009
1. Read packet information for seed starting directions: how many weeks to start before last frost, temperature needed for germination, and how many days to germination. Keep a journal of what varieties you started on what date, and how long it took until germination occurred.

2. I use recyclable, disposable aluminum lasagna pans to start my seedlings, they will last a number of years before you have to replace them. Poke holes in the bottom for drainage.

3. Use a seed starting mix to start your seeds. Seed starting mix is sterile and will help prevent damping off disease, and the light texture aids in germination and rooting of the seeds. Add warm water to your seed starting mix, approximately 1 to 1½ cups of water to four cups of starting mix. Mix thoroughly to get soil evenly moist, it should be damp but not soggy; you should be able to squeeze out a few drops of water when you squeeze a handful.

4. Fill your tray almost to the top, patting down to make a firm layer of soil.

5. Make shallow rows in soil about 1 inch to 1 ½ inches apart; using a pen or pencil push down to make an indentation.

6. Cut open seed packet, and evenly distribute seeds in the rows; for very small seeds hold the packet sideways while lightly tapping the top with your finger to control the flow of the seeds.
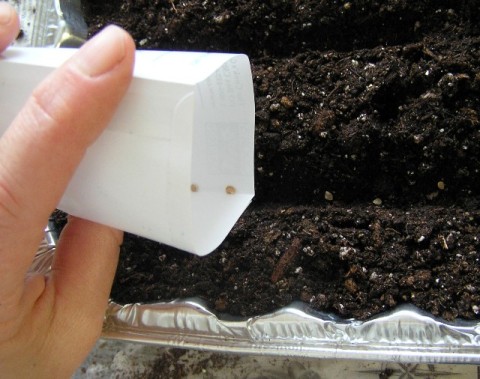
7. Read packet information to find out whether the seed should be covered with soil. Some require covering and others do not, and it will affect the germination of the seeds. If the seeds require covering, cover with a fine sprinkling of DRY seed starting mix, then press firmly so soil makes good contact with seed.

8. Lightly mist rows of seeds, both covered and uncovered.

9. Label variety of seeds on outside of tray.

10. Place a well fitted cover over the tray, or place tray in a clear plastic bag and seal. Place in a warm area (not in direct sunlight) to germinate, unless your packet directions specify otherwise. I place mine on a shelf with a florescent shop light above it; the lights give off a little warmth that speeds germination. I use one cool florescent lamp and one warm florescent lamp, I read once that using both will benefit the seedlings.

Most seeds require about 70 degrees to germinate, and every seed variety has a different time length to germinate. I try to plant seeds together that need the same germination temperature and have the same length of germination time.
11. Monitor for moisture; you should be able to see moisture on the cover and the soil should appear damp. If watering is needed, always water from the bottom, and don’t over water to prevent damping off disease.

12. Remove cover when most of seeds have sprouted. If growing under lights (florescent shop lights will work fine, no need to invest in expensive grow lights), keep the lights just a few inches above the seedlings, this will produce stockier plants. Set a timer to deliver at least 12 hours of light per day. If growing on in a window, choose a bright window that receives a lot of daylight. Monitor daily for moisture. Transplant when seedlings have 2 or more true leaves to individual pots.


